
It’s another day in our 31 Days of Activities event on the site, and we have Suburban Mum offering her wisdom today with this amazing, but simple article show us how to make easy friendship bracelets.
We are pretty sure that everyone has had or even made a friendship bracelet at some point. Suburban Mum’s boys learnt how to make them while we were on a day out at Butser Farm last year and they are relatively easy to make.
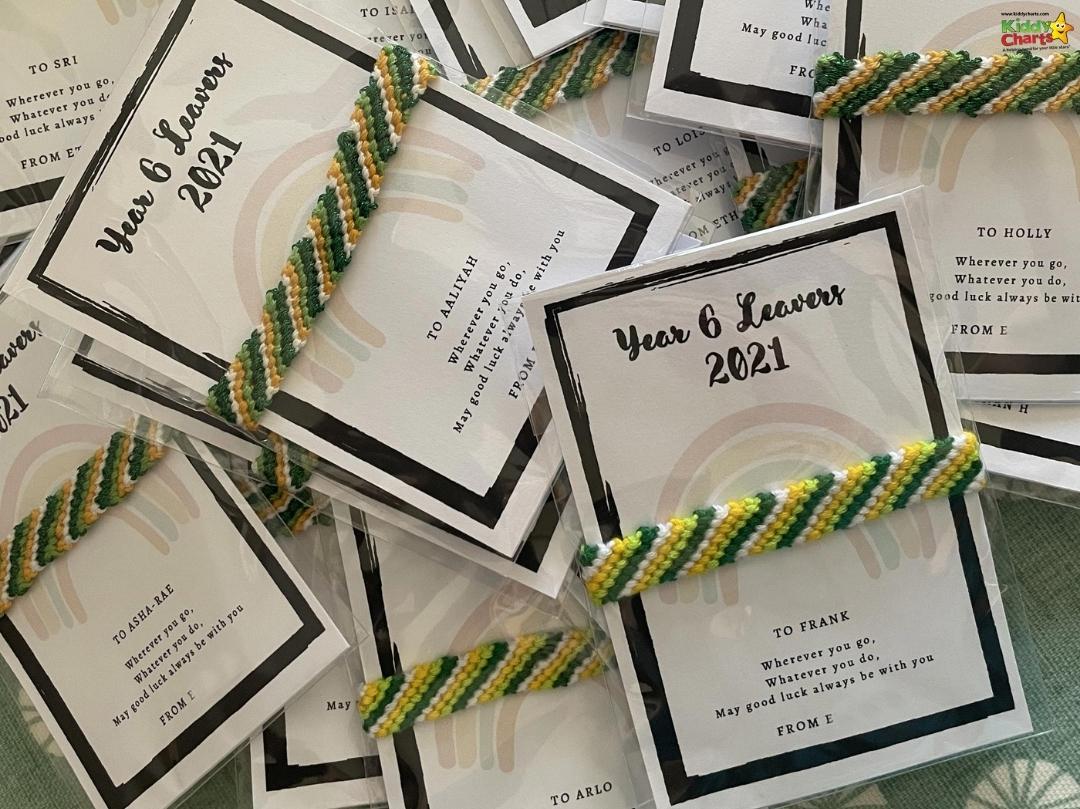
They ended up making them for their eldest’s whole class as a little leaving present when they finished Primary school last year and they went down really well.


In this article, Suburban Mum is showing us how to make our own friendship bracelet easily with a bit of cardboard and some embroidery thread.
How to make your bracelets

We hope you find this as easy as we think that you will – this is what you need for it:
What you will need to make easy friendship bracelets
- Scissors,
- Pen,
- Cardboard,
- Compass to draw a circle or a cup to draw around, and
- 7 different coloured strands of embroidery thread.


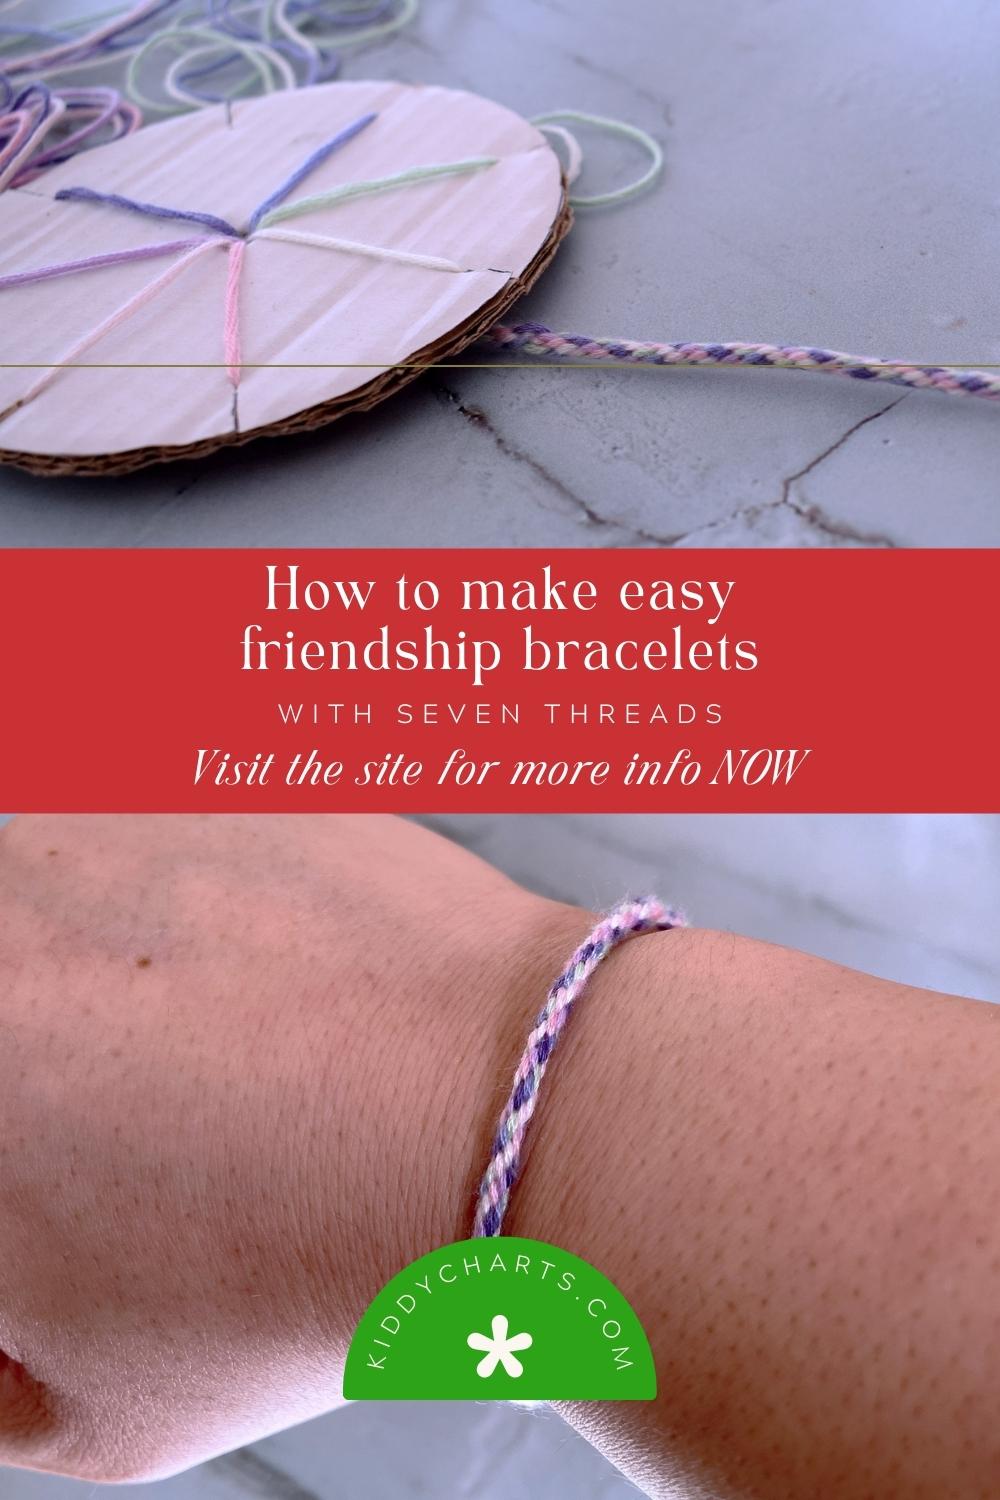
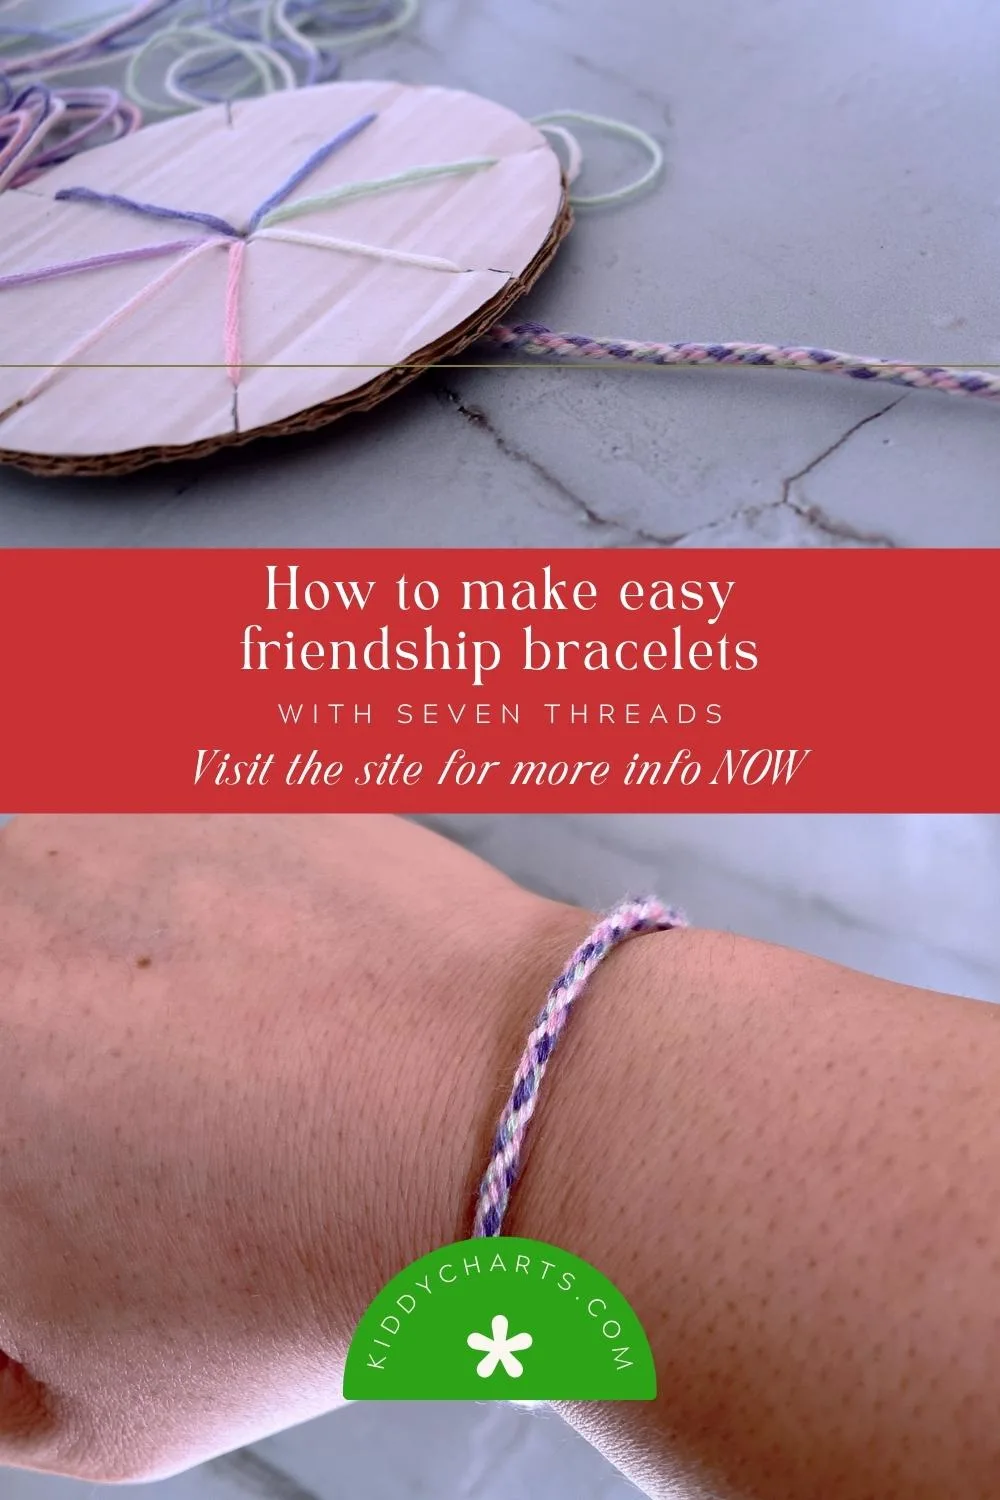
1. Start by drawing a circle on the cardboard using either a compass or draw around a cup and cut this out.


2. Mark the centre of the circle and push your pen through, then mark and cut out 8 slits evenly around the circle,


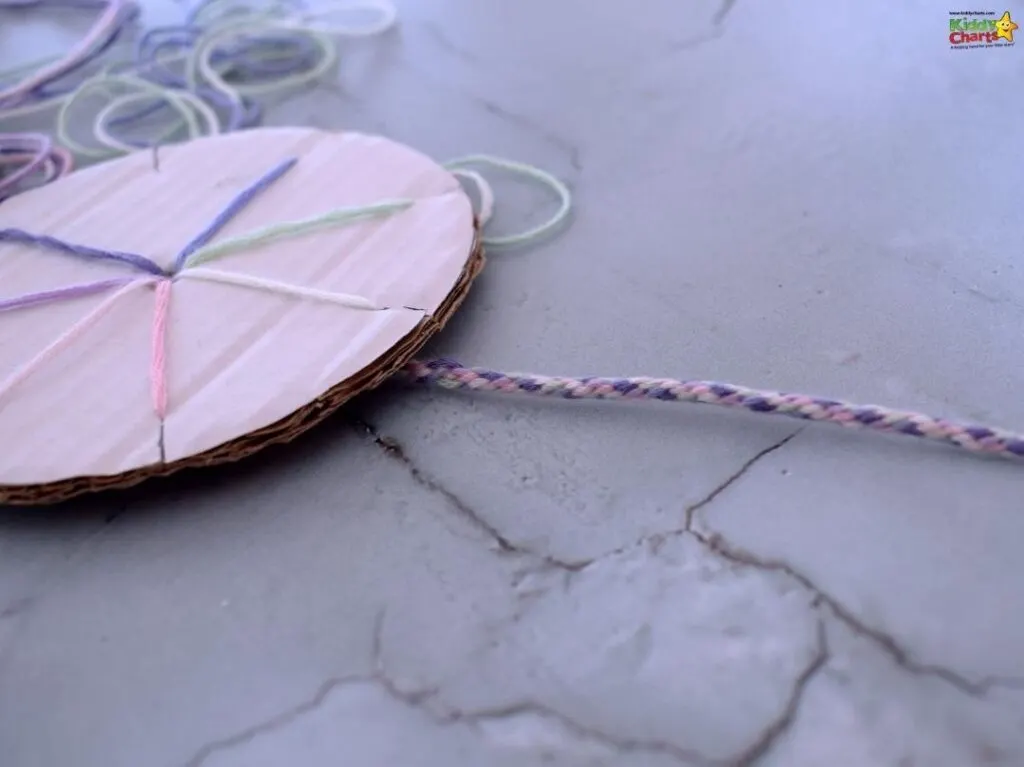
3. Take the 7 different coloured embroidery thread, cut them to around 40cm-50cm in length and tie a knot at one end. You may need to do a double knot to make sure it won’t go through the hole in the cardboard circle.


4. Push the thread through the middle of the cardboard circle and flip the cardboard circle over, thread each colour into 7 of the 8 slits you made earlier.


5. Holding the cardboard circle with the empty slit at the bottom, count three threads to the right, taking the third thread from the slit and moving onto the empty slit at the bottom.
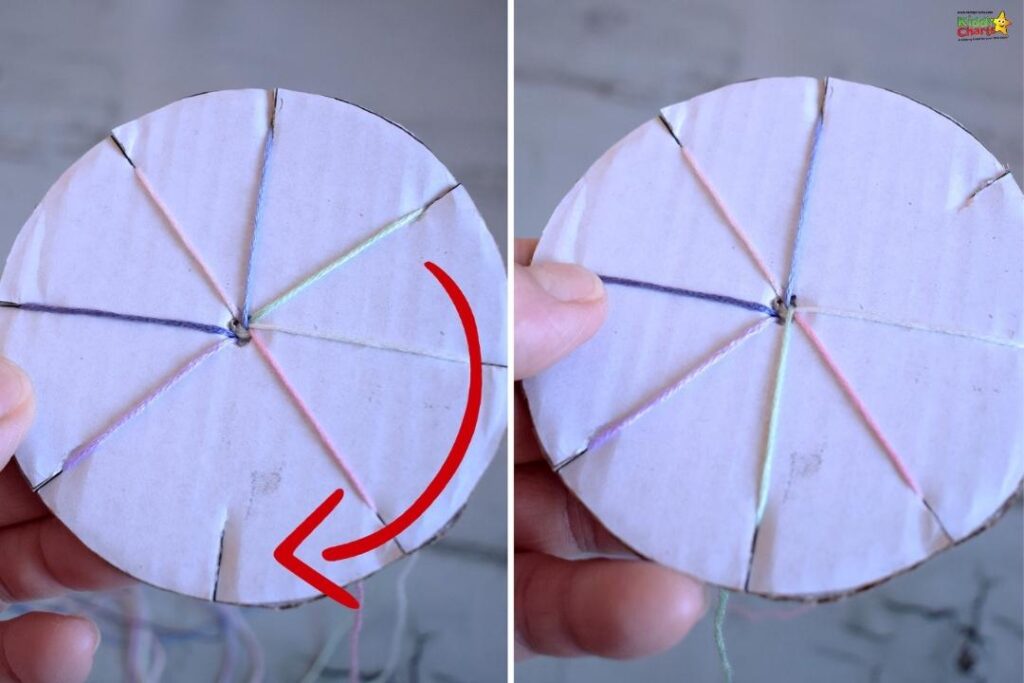

6. Turn the circle so that the new empty slit is at the bottom and repeat over and over. You will eventually see the friendship bracelet being formed on the other side of the cardboard circle.


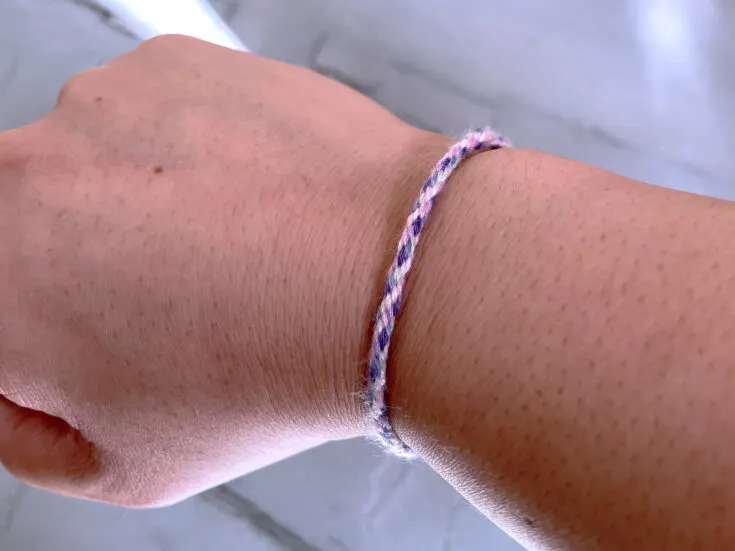
7. Once it is long enough tie a knot at the end.
8. Separate the strands into three and make a plait of 2-3cm and tie another knot once done.


9. Tie another knot making a loop for your bracelet (this is so you can tie your bracelet together on your wrist)


10. Your friendship bracelet is now ready!


All done!
We do hope you like this activity from Suburban Mum. Why not print out the How to card for it as well?
How to make easy friendship bracelets

This is a lovely simple activity to do with the kids - they will LOVE it!
Materials
- Pen
- Cardboard
- 7 different strands of colored embroidery thread
Tools
- Scissors
- Compass to draw a circle or,
- Cup to draw around
Instructions
- Start by drawing a circle on the cardboard using either a
compass or draw around a cup and cut this out, - Mark the centre of the circle and push your pen through,
then mark and cut out 8 slits evenly around the circle, - Take the 7 different coloured embroidery thread, cut them to
around 40cm-50cm in length and tie a knot at one end. You may need to do a double knot to make sure it won’t go through the hole in the cardboard circle, - Push the thread through the middle of the cardboard circle
and flip the cardboard circle over, thread each colour into 7 of the 8 slits you made earlier, - Holding the cardboard circle with the empty slit at the bottom, count three threads to the right, taking the third thread from the slit and moving onto the empty slit at the bottom,
- Turn the circle so that the new empty slit is at the bottom and repeat over and over. You will eventually see the friendship bracelet being formed on the other side of the cardboard circle,
- Once it is long enough tie a knot at the end, Separate the strands into three and make a plait of 2-3cm and tie another knot once done,
- Tie another knot making a loop for your bracelet (this is so you can tie your bracelet together on your wrist), and
- Your friendship bracelet is now ready!
We hope you like this crafting activity – why not check out some of the others ideas on KiddyCharts for kids to make while you are here? We’ve got loads of other craft ideas on site too.
Crafty ideas on KiddyCharts
Here are more ideas for kids to get crafty with on KiddyCharts.
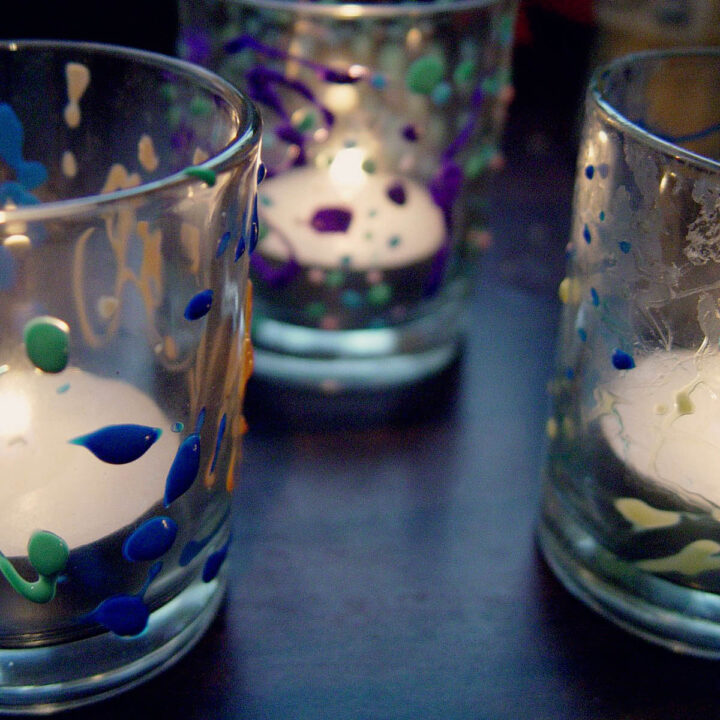

Tea candle craft: Decorating glasses #31daysofactivities
This is a lovely idea - how to make a tea candle with the kids. A perfect activity anytime of year.


Toilet Roll craft: Feathered friends
Who doesn't love a toilet roll craft? Make yourself a feathered friend with this one!


How to paint an owl
Anyone can paint this stunning owl - check out our instructions in this fantastic craft for the kids.
If you are looking for other friendship bracelet ideas – what about these from other similar kids sites to ours?
Friendship bracelet ideas for kids
More ideas for friendship bracelets from the internet, just in case you need a bit more inspiration.


Easy Braided Friendship Bracelets with Letter Beads
Our first bracelets have letter beads in them - to give them a little more personalisation.


MARBLED CLAY FRIENDSHIP BRACELETS - Red Ted Art - Make crafting with kids easy & fun
You don't just use threads and beads for friendship bracelets, you know. Red Ted Art has these fantastic ones made with marbled clay.


Super Easy Twisted Friendship Bracelet
This is a "twist" on the traditional friendship bracelet from the fantastic Twitchetts.
If you like this, why not sign up for our newsletter and get our articles as they happen:
We’d love to see you on the site again soon too,
Helen


Maria Hyrapiet
Maria lives in Surrey with her husband and two boys. She enjoys writing about her family life on the blog and exploring the UK and beyond as a family. Maria can often be found sharing her life on Instagram with a cup of tea in hand.